
【Rでベイズ統計モデリング#1】Stanのインストールと基礎
記事の目的
Stanのインストールから、基礎までを解説していきます。
目次
1 rstanのインストール
1.1 コード
# 1 rstanのインストール
## 1.1 rstanのインストール
install.packages("rstan", repos='https://cloud.r-project.org/', dependencies = TRUE)
library(rstan)

## 1.2 C++の確認
pkgbuild::has_build_tools(debug=TRUE)
1.2 解説
StanをRで利用する際に必要なものは「rstan」と「C++」の二つである。Windowsの場合は上記のコードを実行することでインストールすることができます。Macの場合は、以上のコードを実行する前に「C++」の必要なものをインストールする必要があります。例えば、ターミナルで「xcode-select –install」を実行する必要があります。
2 Stanファイル
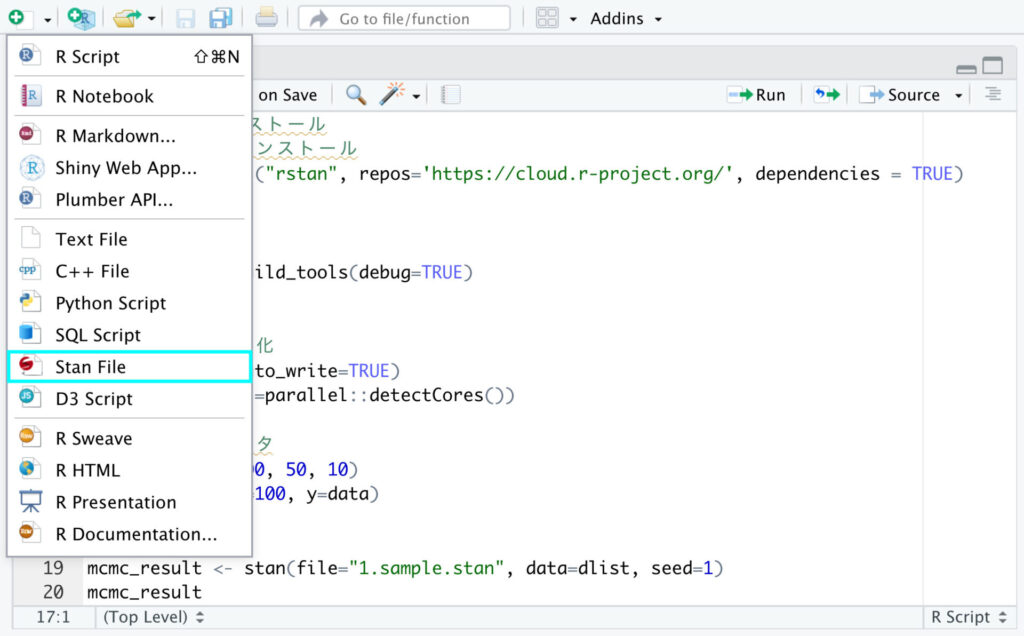
2.1 Stanファイルの作成
RStudioの右上のプラスボタンから作成することができます。
2.2 Stanファイルのデフォルト
//
// This Stan program defines a simple model, with a
// vector of values 'y' modeled as normally distributed
// with mean 'mu' and standard deviation 'sigma'.
//
// Learn more about model development with Stan at:
//
//    http://mc-stan.org/users/interfaces/rstan.html
//    https://github.com/stan-dev/rstan/wiki/RStan-Getting-Started
//

// The input data is a vector 'y' of length 'N'.
data {
  int<lower=0> N;
  vector[N] y;
}

// The parameters accepted by the model. Our model
// accepts two parameters 'mu' and 'sigma'.
parameters {
  real mu;
  real<lower=0> sigma;
}

// The model to be estimated. We model the output
// 'y' to be normally distributed with mean 'mu'
// and standard deviation 'sigma'.
model {
  y ~ normal(mu, sigma);
}
3 Stanの利用例
3.1 コード
# 3 Stanの利用例
# 3.1 Stanの効率化
rstan_options(auto_write=TRUE)
options(mc.cores=parallel::detectCores())

# 3.2 sampleデータ
set.seed(1)
data <- rnorm(100, 50, 10)
dlist <- list(N=100, y=data)

# 3.3 Stanの利用
mcmc_result <- stan(file="1.sample.stan", data=dlist, seed=1)
mcmc_result
3.2 実行結果